Wednesday, November 24, 2010

MasterChef Auditions


So I did something really crazy this past Saturday. I went to the open call for MasterChef Season 2 that was held here in Orlando. The show features "talented home cooks" with no professional experience so I figured it was right up my alley.

The event started at 10 am at the Le Cordon Bleu College of Culinary Arts and went through until 6 pm. I got there at 10 and got on line. You were to bring with you a completed application, a picture of yourself, a dish for the judges to try and a picture of your dish. So there we all were. This very long line of hopefuls carting coolers and bags, you name it. I was number 172.


At first it seemed like things were going to move along more quickly than it ended up. They had people going around doing official-like stuff such as making sure you had your application, stapling your picture to the back of it, giving you a number to wear....and then we waited....in the sun....it was hot. We got hungry and thought of all the really good food that was in all these coolers surrounding us! We got to be buddies with the people near us on the line.

So close yet so far...


They were taking groups in, 30 people at a time. Each group was in for at least 1 hour before the next group got in. I finally got to the "line starts here" sign at noon and was hopeful. Then at 1:30 pm I got through the door, but wait, the guy had miscounted and I was one too many. Surely they could have squeezed me in but no, I was sent back outside to wait again. I was first on line now though. The 1:30 group took 1 1/2 hours so I finally got in at 3! We all had 3 minutes to plate our food. We were all pretty much done in 1! Then at least 2 judges tasted your food and another judge walked around and gave you the opportunity to tell her your 30 second story. They all secretly rated you on a score card attached to your application and laying face down on the table. Then they left to discuss whatever it is they discuss.


Meanwhile we were all starving and asking for tastes of all the really good looking food - who cares if it had been sitting for 5 plus hours in a cooler and was supposed to be hot or cold but as of now was all the same temp regardless! And the food I tasted was really, really good. I brought dim sum - pot stickers, siu mai and spring rolls. It was really, really good. When the judges came back out they told us we could toss out our food now, indeed they had trash cans set up for such a thing. Are you kidding? I brought mine home to heat up hot enough to kill all living things and eat. Plus, I brought this awesome smoked salmon cheesecake from my line-mate, Mary, home too. It was divine. Ok, back to the event...


The judges came back out. They called out about 7 names and said for those folks to stay and the rest could leave. Of course they told those sent out at that point that they had their contact information and they were not out of the running yet. But guess what? I was one of the lucky ones asked to stay! Yay! So we got to go up before another panel of judges and now we got to tell our 5 minute story! We went before the judges in a group of 4. We were then sent out to the hall to wait. Then the judges told 2 of us to stay and sent 2 home. And guess what? I was asked to stay! Yay! They scheduled me to come in the next day and do a video taped interview. On Sunday I got up and actually got dressed nicely and put on makeup and headed out. This time I got to tell my 30 minute story on camera. WOWEEE. I made it to round 3.


Needless to say, I was told that I needed to go home and make a video of myself in my home environment and they would email me with instructions on where to send it so it could be included with my taped interview but I have yet to hear from anyone. So I may have reached the end of the line for this show but hey, nothing ventured, nothing gained. It sure was something different to do. And I was so hopeful for 48 hours I was floating. I still am, after all, I made it to round 3. We asked how many showed up on Saturday and they said over 500. So to be picked out of that large of a crowd is pretty impressive I think. I am already working on what dish I am going to bring to the open call next time. I plan to try out until I make it on the show!

Sunday, October 24, 2010

Sausage Making


I love sausage - italian sausage, bratwurst, chorizo, breakfast sausage - you name it. It is good stuff. So, when I got my KitchenAid mixer with the meat grinder attachment, I decided to try my hand at it. The very first time I made it was quite interesting. I really had no idea what I was doing. At that time my local grocery store still cased their own sausage and so they sold me some casing. I had my recipe in hand and went about grinding the meat and making my sausage filling. This all went fine but then I had to get the meat into the casing. I did not have the sausage stuffer attachment. I wracked my brain for a solution to how I could manage to get the sausage into the casing. I finally found a plastic turkey baster in the drawer. I sawed it off to about 6 inches. I threaded the casing onto the baster and hand pushed the sausage mixture through the tube into the casing. It was quite a production and took a bit - okay - a lot of time but, the sausage came out so good I was hooked.


My grocery store no longer makes their own sausage so I order the casings on line and keep them on kosher salt in the fridge. I now have a sausage stuffer attachment for my KitchenAid mixer which is truly an AID!!!!! My favorite sausage cookbook is Bruce Aidells' Complete Sausage Book. All of the recipes I have made from this book are wonderful. The following 2 recipes are adapted from recipes in this book.


These 2 recipes both come out so good. They are both a chicken sausage but beyond that they are completely different. My local grocery store had 10 pound bags of chicken leg quarters on sale for $5.90 per bag. So I bought a bag with sausage in mind. I boned all the meat. When done I had yielded about 7 pounds of chicken with skin even after tossing about 12 ounces of skin. I made chicken stock from the bones (which I used in my turkey gravy from the previous post). I divided the chicken in half and made two kinds of sausage.


Chicken and Sun-dried Tomato Sausage
3 1/2 pounds boned chicken thighs and legs with skin
1/3 cup chopped oil packed sun dried tomatoes
1/4 cup white wine
1/4 cup grated Parmesan cheese
3 tablespoons crushed garlic
2 tablespoons fennel seed
1 tablespoon freshly ground black pepper
3 teaspoons kosher salt
2 tablespoons chopped fresh parsley
2 tablespoons chopped fresh basil
1 teaspoon red pepper flakes
1 teaspoon paprika
1 teaspoon sugar

Medium Hog Casings


Put the chicken meat through the meat grinder. I like using the fine grinding plate as opposed to the coarse one. Mix the ground chicken thoroughly with all the remaining ingredients except hog casings.


Place the sausage stuffer attachment on the KitchenAid mixer as instructed. For 3 1/2 pounds you will need about 3 - 4 feet of casing. Rinse the casing well. Plug the drain in the sink and soak the casing. Run water through it a couple of times. Feed it onto the sausage stuffer and you are ready to go. I stuff the casing in one long tube . When it is stuffed I form the tube into links. I then take a toothpick and puncture any air pockets.


Place the sausage in a single layer on a plate and place in the fridge, uncovered, to cure overnight. At this point it is ready to cook or freeze. If not using within 3 days, wrap and freeze it.


Chicken and Apple Sausage

1 cup apple cider
2 granny smith or braeburn apples
1 tablespoon lemon juice
3 1/2 pounds boneless chicken thighs and legs with skin
1/4 cup chopped crisped cooked bacon
3 teaspoons kosher salt
2 teaspoons freshly ground black pepper
2 teaspoons dried sage
1/4 teaspoon ground ginger
1/8 teaspoon ground cinnamon
1/8 teaspoon ground nutmeg
1 chicken bouillon cube dissolved in 2 tablespoons hot white wine

Medium Hog Casings

Advanced prep: Boil the apple cider until reduced to 2-3 tablespoons. Dice the apples to 1/4 inch dice. Toss with the lemon juice. Spread on a parchment lined cookie sheet and place in a 300 degree oven until dry. Toss every half hour or so. This goes much quicker if you set the oven for convection. If not about 2 hours. With convection 1 - 1 1/2 hours.


For sausage: Cut chicken into chunks. Mix with the reduced cider, dried apple and all remaining ingredients except the casings. Put the mixture through the fine grinder on the meat grinder attachment.


Prepare the casings as in the recipe above and stuff the sausage accordingly.


Both of these sausages are good served alone or in a dish. I served both as an appetizer when my friend April was over for dinner. I made little polenta stars (next time polenta circles mind you) and sliced each kind and placed the slices on the polenta stars. For the chicken and apple sausage I drizzled a sauce made with 1 cup of apple cider and 1 cup of beer boiled together until reduced to about 1/2 cup. That's it.


For the chicken and sun dried tomato I made an herb pesto with the last of my herb garden. Into the food processor went:

Herb Pesto and Herb Pesto Sauce

1/2 cup fresh basil
1/2 cup fresh parsley
1 tablespoon fresh oregano
1 tablespoon fresh mint
2 teaspoon fresh rosemary
1 teaspoon dried thyme
1 teaspoon ground black pepper
1/2 teaspoon kosher salt
2 tablespoons toasted walnuts
3 cloves crushed garlic
1/2 teaspoon crushed red chili pepper
1 tablespoon olive oil
1/4 cup extra virgin olive oil
1/4 cup heavy cream
Mix everything except the 1/4 cup of olive oil and cream in a food processor until well blended. Remove all but one tablespoon of the pesto from the food processor. To the tablespoon remaining add 1/4 cup olive oil and 1/4 cup heavy cream. Blend to combine. Serve over sausage.


The remaining pesto is wonderful as a dip for bread. Just place a teaspoon on the dipping dish and top with extra virgin olive oil.


Polenta Stars

2 cups water
3/4 cup cornmeal
1/2 tsp salt
1/4 cup Parmesan cheese
2 tablespoons cream or half n half


Combine water, cornmeal and salt in a medium saucepan and bring to a boil. Cook stirring constantly until thick and smooth, about 5 minutes. Stir in the cheese and cream and continue to cook until combined, 2-3 minutes. Our onto a parchment lined 1/2 sheet pan and spread to about 1/4 inch thick. Refrigerate until thoroughly chilled and set. Cut into whatever shape you desire.

Melt some butter in a nonstick frying pan and lightly fry the polenta shapes until crisp on both sides. Top with sausage and drizzle with sauce.


Picture Perfect Turkey


This past weekend I invited my friend April from http://www.aprilslittlefamily.com/ over for dinner along with her three little ones. I decided to cook a turkey. I love turkey and I do not know why we reserve it for the holidays. It makes a wonderful dinner and the leftovers are awesome. I am always bummed the day I take the last of the leftovers out and use them!


My favorite method to cook turkey is to first brine it and then smoke it. The turkey comes out gorgeous! Look at the pictures! It is an even mahogany color. It looks like I painted it or something for the photos. I did nothing but smoke it and the best part is - it tastes even better than it looks. I start to brine it about 12 -15 hours ahead of time and then smoke it for about 5 hours. I use an electric smoker which makes it pretty maintenance-free once the bird is in there cooking. This method of cooking produces the most moist and flavorful turkey ever.


I do not have room in my fridge for the turkey while it is brining so I pop it in a playmate cooler with the brine and ice and it works just fine. One thing to note, when you cook turkey using this method you do not get a pan of drippings for gravy. I simply take the neck and gizzards and roast them with a sliced onion in the oven until they are nicely browned. I deglaze the pan with chicken stock, strain the liquid and whisk in a slurry of milk and flour to thicken it as it comes back up to a boil on the stove. Gravy problem solved.


Brined and Smoked Turkey

A 15 pound turkey
1 gallon of water
1 cup kosher salt
1/2 cup sugar
2 cups apple juice
1 tablespoon fresh ground pepper
1/4 teaspoon cinnamon
1/4 teaspoon nutmeg
2 bay leaves
3 tablespoons butter

1 1/2 cups wood chips for smoking (I used hickory this time)


Bring all the ingredients except the turkey and butter to a boil and dissolve the salt and sugar. Remove from heat and cool to room temperature. Place the turkey breast side down in a playmate cooler. Pour the cooled brine over the turkey. Add enough ice so that the brine level rises to cover the turkey. Leave it for 12 to 15 hours.

Also at this time start soaking your wood chips in water to cover.

When ready to smoke, follow your smoker's instructions. For mine, I place the wrap the wood chips in foil, poke holes in the foil and place them in the lava rocks on the bottom. I fill the water pan completely. Drain the turkey and rinse in fresh water. Pat dry. Melt the butter. Set the turkey on the upper rack in the smoker and brush all over with the butter. Place the cover on. I let it smoke for 5 hours this time. The temperature outside was about 84. When the temperature is cooler it may take a little longer to smoke. Just remember, open the lid as little as possible to retain the heat and smoke. I do not ever open it for at least the first 3 hours. It also helps to fill your water pan with hot water. This speeds up the heating process inside your smoker.

This turkey came out so good! I cannot wait until Thanksgiving when I will cook another. Oh, and do not forget about those wonderful turkey bones. After cleaning off the meat toss all the bones in a pot and cook for 1 1/2 hours for the best, most flavorful turkey broth ever!


Monday, October 11, 2010

The first annual Food & Wine Classic at the Walt Disney World Swan and Dolphin Resort


What a weekend I have just had! This year the Swan and Dolphin Resort held their first Food & Wine Classic to coincide with Disney's Epcot Food and Wine Festival. When I saw the advertisement for the event in the paper I told my husband we just had to go. They offered a couple of different options including an a la carte ticket option where you purchased tickets for samples or you could purchase a wristband for $50 which then got you unlimited samples plus one of 6 seminars or, and this was the best deal yet, for $169 you got the seminar and wristband for 2 AND a room for the night. So I booked it. I thought the whole thing was extremely well executed.

Apparently other people read the same paper I do and think the same as I do because by the time I called to book our night our first two seminar choices were full. Those were the wine blending seminar and the one titled "Beer Please." So we settled for Modern Mixology. Well you know, I am glad the others were full because we learned some really cool stuff in our seminar.

Our evening began at 4:30 when we attended the seminar. It was conducted by Doug Draper, bluezoo's General Manager and Lindsay Skillman, Cabana Bar and Beach Club's Manager. They did a fantastic job. In the seminar they went over different techniques they use to create memorable cocktails at their restaurants. The first thing we learned was how to make the bluezoo's Zooberry Cocktail. Then they brought around a sample for everyone. YUM! Then they showed us how to use different chemical reactions to create some WOW factor for cocktails. They used agar agar to make these cherry flavored balls out of grenadine and they used sodium alginate and calcium chloride to produce these little balls of flavor that will burst in your mouth when added to a cocktail. They illustrated it with orange juice. We squeezed the mixture of OJ, calcium chloride and sodium alginate into a bowl of water to form little balls. These were strained and added to a mimosa cocktail. Most of the stuff they showed us can be reproduced at home so watch for a future post where I experiment with some of these techniques. The one technique that we learned about but will not be happening at home was the use of liquid nitrogen. Very cool but not home friendly. We did get to sample cocktails and food featuring all the techniques we learned about.

The seminar lasted one hour. As we left we each got a tray that had a wine glass holder and of course a wine glass and we headed out to the causeway between the Swan and Dolphin to begin the rest of the evening. The Food and Wine sampling went from 5:30 to 9:30. They had a live band. They featured food from all of the restaurants in the Swan and Dolphin so let me start there. The Cabana offered a crab meat and watermelon concoction that I did not think I would like but did . The Fountain offered falafel with a really yummy dipping sauce. Next was Kimono's serving sushi which was delicious. The best was Shula's. They had filet mignon and creamed spinach. We stood on line for that one 3 times! The Il Mulino New York Trattoria had the most amazing pasta bolognese and Todd Engish's bluezoo offered these buffalo chicken bites with blue cheese dressing. Finally, there was a booth of desserts by Executive Pastry Chef Laurent Branlard.


Now onto the wine ... and more! There were 6 wine stations. The first featured Valley of the Moon from Sonoma Valley. I had the unoaked chardonnay. It was delicious. Next were wines of Washington featuring Ste. Michele. I stuck with white and it was very nice. Then there was Malbec of Mendoza featuring wines from South America. They were wonderful. We moved on to the Vino of Veneto with wines from Italy and a Taste of New Zealand and Down Under featuring wines from both of those regions. I tried them all and they were all wonderful.


My favorite station was the Base to Bubbles. Champagne was served there and I love good champagne. I visited them several times! We also sampled sake at Ty Ku Fusion. We sampled several different beers at the Beer Please! station and we tried 2 kinds of cocktails at the cocktail competition between Swan and Dolphin bartenders. My favorite was the Sangria being served at the Modern Mixology booth. After putting the sangria in your glass they topped it off with fruit freeze dried in liquid nitrogen. It made the drink steam the fruit was crunchy and delicious. Check out the picture! Loved it! They also featured white russians served frozen in little balls using liquid nitrogen.

The whole thing went above and beyond my expectations. The fact that they brought all the different techniques and learning's from the seminars out into the tasting area was really great. Also, now that we have sampled a taste of these restaurants we will definitely be returning for the full blown meal! The restaurants stand on their own and should be enjoyed as an evening out and not just as a hotel guest.

In conclusion, this was a fantastic event which we will come back to. I am glad we had a room for the night afterwards!


Wednesday, September 22, 2010

This one deserves its own post!


I have been posting many of the cookie recipes that I baked for the girl scouts from the ones they submitted as their favorites. THIS recipe is the best one so I am giving it its own post. This is the best and my all time favorite. I will be making this again and again. It can be customized to whatever holiday you are celebrating.

Howling Candy Corn Cookie Bark
16 Oreo Cookies, coarsely chopped
1 1/2 cups pretzels, coarsely broken
1 bag (12 oz) white chocolate chips
1/2 cup candy corn
Halloween Sprinkles

Spread cookies and pretzels on a parchment lined cookie sheet. Melt white chocolate (60 seconds in the microwave, let stand 30 seconds then stir). Drizzle white chocolate over the cookies and pretzels. Use a spatula to make sure everything is well coated with the chocolate. Press the candy corn and sprinkles onto the bark. Cool completely then break into pieces.

COOKIES


Ok, I have been seriously busy! My daughters are in Brownies. Their leader has a Brownie troop and a Junior troop with 24 girls total between the two troops. As part of one of their badges they each submitted their favorite cookie recipe and made up little cookbooks with all the recipes in it. At the next meeting we decided they should have an opportunity to try all the cookies. This is where I come in. I have a rather large kitchen so I volunteered to host this meeting. I also volunteered to make all the recipes! Well, their leader did make the 2 recipes submitted by her girls. I saved 4 of the recipes for them to make at the meeting. Each meeting is one hour so I had to make sure the recipes I saved were doable in that amount of time. The other 18 recipes had to be done in advance. The meeting was on Monday, 9/13 at 3:30. My family and I spent the weekend at Disney and did not get home until late Sunday evening so I did not get started baking until 9 pm on Sunday.

I baked the hardest ones on Sunday night and was up until 3 am. The next morning I started in again at 8:30 after getting the girls off to school. I finished the last batch at 2:30 and had an hour to prepare for the kids to arrive at 3:30. There were a TON of cookies! I am going to post the favorites here. I have pictures of most but I did not take pictures of the buckeyes because I did not think I would be posting that recipe. That was one of the ones I made on Sunday night and it was the most time consuming. It had me questioning my sanity. The dough is very crumbly and does not look like it will come together. I panicked and hit the Internet to check out other recipes to see if I had done everything right! Then, it made like 100! And, each one has to be dipped in chocolate! I would have been in bed by 1:30 had it not been for that recipe! However, it did taste really good. I got a lot of comments on them. So, I will post the exact recipe here. If you make them I would 1/2 the recipe. But they are really good. So, that said let's get started:

Tuesday, September 21, 2010

More Cookies!


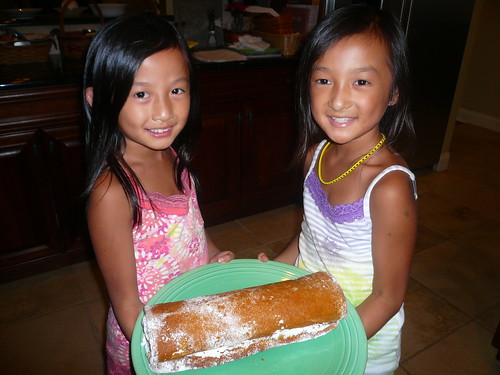
Here are some of my favorites of the cookies I made for the Girl Scouts. Five of these are in the picture. I am also including two recipes that are not, the Buckeyes and the Gingersnaps. I got so many comments on those that they need to be included, they are good.

Gingersnaps


1 1/2 cups firmly packed light brown sugar
1/2 cup black strap or dark molasses
1 egg at room temperature
1 cup butter, melted and slightly cooled
2 2/3 cup flour
2 tsp ginger
1 1/2 tsp each cinnamon, ground cloves & baking soda
3/8 tsp salt
Granulated sugar

Combine brown sugar, molasses and egg in a large bowl and mix well. Beat in butter.

Sift together flour, ginger, cinnamon, cloves, baking soda and salt. Add to butter mixture. turn dough onto lightly floured surface and shape into 4 long logs. Cut each in half crosswise to make eight logs and roll them about 5/8 inch thick. Freeze until thoroughly chilled, about 1 hour.

Preheat oven to 350. Lightly grease baking sheet. Put a 1/2 inch layer of sugar in a pie plate. Cut logs into 1/4 inch thick slices. Coat each slice with sugar. Flatten to about 1/8 inch and place 1 inch apart on baking sheet. Bake for 6-8 minutes. Let cool about 30 seconds and then remove to a cooling rack. Sprinkle with additional sugar.

This recipe makes 30 dozen cookies. That is a lot of cookies but the rolls of dough can be kept in the freezer until needed and just thawed until you can slice them before baking so it is a great dough to have on hand.


Buckeyes


I was almost not going to share this recipe but it got such rave reviews and I have to admit that I really like them so here they are. Unless you want to feed a lot of people halve the recipe!

3 cups creamy peanut butter
1 1/2 sticks butter, softened
2 lbs confectioner's sugar
16-32 ounces chocolate chips melted

Mix together the peanut butter and the butter. Add the confectioner's sugar and stir until well combined.

This is where I thought I was doomed! The dough looked like crumbs. I wanted to add more butter or peanut butter to make it come together. I ran to my computer to look up similar recipes to see if I was on track. Needless to say, when you grab this stuff and roll it, it will come together. I made it into walnut size balls. Once rolled, chill the balls.

Melt chocolate. Here I must interject something. I have found that here in Florida, melted semisweet chocolate morsels never really set up firm again. Maybe it is the heat and humidity but the chocolate stays somewhat soft and messy so I would recommend using the chocolate candy disks they sell and places like Michael's.

Using toothpicks or skewers to hole the cookie, dip them in the melted chocolate leaving some of the cookie exposed on top. Place on wax paper lined sheets until set.

Okay - I was only going to post what I thought was the best, but the above 2 recipes got rave reviews so I felt compelled to share them here. Below are my favorites!

Chocolate Chip Treasure Cookies

1 1/2 cups graham cracker
1/2 cup flour
2 tsp baking powder
1 (14 oz) can sweetened condensed milk
1/2 cup butter, softened
1 1/2 cups flaked coconut
1 (12 oz) package semi-Sweet chocolate chips
1 cup walnuts, chopped

Preheat oven to 375. Combine graham cracker crumbs, flour and baking powder. In a large bowl beat together milk and margarine. Add dry ingredients and mix well. Stir in coconut, chocolate chips and walnuts. Drop by rounded tablespoons onto ungreased cookie sheets. Bake 9 minutes.

Peanut Butter Cookies

1 cup peanut butter
3/4 cup shortening
1 cup brown sugar
1 cup white sugar
2 eggs
3 cups flour
2 tsp baking soda
1 tsp vanilla

Preheat oven to 350. Mix together all ingredients. Roll into small balls. Dip a fork in flour and use ti to slightly flatten each cookie. Bake for 8-10 minutes until golden brown.

The formed dough balls can be frozen and thawed and baked as needed.

Cinnamon Cookies

1 cup butter
1 1/2 cups granulated sugar
1 egg
1 1/2 tsp molasses
2 1/4 cups flour
1 1/8 tsp baking soda
1 tbls ground cinnamon

Preheat oven to 350. Cream together butter and sugar. mix in egg and molasses. Sift together the flour, baking soda and cinnamon. Add to creamed mixture. Drop by teaspoons onto ungreased cookie sheet. Bake 10 -12 minutes.

The following bars are really good.

Chocolate Chip, Oats 'n Caramel Cookie Squares


1 roll Pillsbury refrigerated chocolate chip cookies
1 cup quick cooking oats
2/3 cup caramel topping
5 tbls flour
1 tsp vanilla
3/4 cup chopped nuts
6 oz semi sweet chocolate chips

Heat oven to 350. In a large bowl break up cookie dough. Knead in oats. Reserve 1/3 cup dough. Press remaining dough in a 9 inch square pan. Bake 10 to 12 minutes or until dough puffs up and appears dry. In a small bowl mix caramel topping, flour and vanilla. Sprinkle walnuts and chocolate chips over crust. Drizzle with the caramel mixture. Crumble the reserved oat mixture evenly over the top. Bake 20 to 25 minutes. Cool completely then cut into squares.

I love coconut so this next pick was a given!

Coconut Cream Macaroons

3 7 oz packages sweetened, flaked coconut
1 cup flour
1/2 tsp salt
1 can sweetened condensed milk
2/3 cup canned cream of coconut
1 tbls vanilla
1/4 tsp almond extract
1 large egg
1 bag (12 oz) semi sweet chocolate chips
1 tbls vegetable oil

Heat oven to 350. Line cookie sheets with parchment paper. Sprinkle 1 cup of the coconut on a parchment lined cookie sheet and bake 5-7 minutes, stirring occasionally until lightly browned. Cool. Leave parchment on cookie sheet for baking cookies. Mix the toasted coconut, remaining coconut, the flout, and salt in a large bowl. Beat together the milk, cream of coconut, vanilla, almond extract and egg until well blended. Pour over dry mixture and mix well. Drop by heaping teaspoons onto cookie sheets. Bake 12-14 minutes until golden brown. Cool completely.

Heat the chocolate and oil over low heat until the chocolate is melted. Drizzle the chocolate over the cookies. Let stand until chocolate is set.

Monday, September 20, 2010

Cake Mix Cookies


The following 3 recipes all use a cake mix. They are super easy to make and the dough is easy to work with so if you are in a hurry and need a quick cookie to bake up with ingredients you can keep on hand these are for you! The first recipe is for Snicker Doodles. These are really good but especially awesome served warm from the oven. This is what I do when I am entertaining. I make the dough and form it into balls. I put them in the fridge. When my guests sit down for dinner, I preheat the oven and quickly roll as many balls as needed in cinnamon sugar and bake them. I serve them fresh and warm!


Snicker Doodles


1 box Yellow cake mix
1/3 cup oil
2 eggs
2 tsp vanilla

1/4 cup sugar
2 tsp cinnamon

Mix together the cake mix, oil, eggs and vanilla. Roll into 1 inch balls. The balls can be refrigerated at this point if desired. Stir together the sugar and cinnamon. Right before baking roll the balls in the cinnamon sugar. Place on cookie sheets and bake at 375 for 10 minutes.


Lemon Snowflakes

1 box Lemon cake mix
1 egg
2 1/4 cups thawed cool whip
powdered sugar for rolling

Preheat oven to 350. Mix the first 3 ingredients. The batter will be very soft and sticky. Drop teaspoons of dough into a bowl of powdered sugar. Shake around until completely covered. Remove from sugar and place on a parchment lined cookie sheet. Bake 8-10 minutes.

Chocolate Fudge Cookies

1 box Devil's food cake mix
2 eggs
1/2 cup vegetable oil
1 cup semi sweet chocolate chips

Preheat oven to 350. Combine all ingredients. Roll into walnut sized balls. Place on parchment lined cookie sheets. Bake 8-10 minutes. Cool on baking sheet 5 minutes then remove to a cooling rack to cool completely.


Sunday, August 29, 2010

Low Carb Steak Dinner


Last night my daughters went to a sleepover so that meant that my husband and I got a date night! In keeping with our current diet, we did it up right with a low carb steak dinner. The menu was simple but satisfying:

Perfectly cooked Fillet Mignon topped with Boursin Cheese

George Stella's "Mock" Garlic Mashed Potatoes

Green Beans Almondine

To cook the filets, I heated a cast iron skillet in the oven to 500. I seasoned the steaks with kosher salt. When the oven was fully preheated I put the skillet on a burner turned up to high and seared the steaks for 30 seconds and then flipped them and put the in the oven for about 5-6 minutes after which I flipped them again and continued cooking them for 5-6 minutes to medium. When done, I transferred them to a plate and topped them with store bought boursin cheese spread. I covered them and let them rest for a full 5 minutes before serving.

The Mock Mashed Potatoes are made with cauliflower and George Stella has really nailed it. I made them exactly as the recipe appears here:

http://www.foodnetwork.com/recipes/george-stella/mock-garlic-mashed-potatoes-recipe/index.html


I steamed the cauliflower rather than boiled it. When it was done, I removed the steamer basket and let the cauliflower dry that way rather than having to squeeze between paper towels. While the cauliflower cooked, I put the remaining ingredients in the bowl of the food processor so it was ready to go. I also made them before starting on the rest of dinner and right as were were about to eat, I zapped them in the microwave for 2 minutes, stirred them up, and topped them with butter. I found that doing this improves the texture. I did not have chives but I did have scallions so that is what I garnished the dish with. As you can see the meal looks beautiful and we are feeling well fed!

Monday, August 23, 2010

Low Carbing it....


OK, I never thought I would consider a low carb diet. I tried to read some of the books on it but they just did not catch my interest. I also love my carbs - pasta, good bread, rice - you name it. I do not think I wanted to learn about it so just did not even try. This all changed recently. For one thing, my husband had gained some unwanted pounds and his blood sugar was too high. His doctor has been telling him for some time to work on lowering it. In addition to that he is on cholesterol lowering medication which is just not healthy. Still, these issues did not motivate me to learn ways to fix it. I honestly thought I was cooking healthy food. That is until our recent vacation.


We were in Maine and the house we stay at does not have cable TV or access to the internet or a working phone and our cell phones do not get a signal there either. So at night we sip wine and read. The local library has a used book shop and the books on the porch are .25. So I sprang for a Suzanne Somer's book for that evenings entertainment. Her diet is a low carb plan that also focuses on food combining but what really got me was the way she explained everything. I finally got it. In addition was the food itself. It was truly not as limiting as I thought it would be. You are allowed to eat really good food. I could do this! I could do this for my husband. After reading the book himself he bought into it as well.

So we started the plan the day we returned from vacation. Twelve days later my husband had his quarterly doctors appointment. For the first time in years his blood sugar was below 100 and his blood pressure was in normal range. We are still working on the cholesterol issues and hope to get him off the medication. It has been six weeks now and he has lost about 10 pounds. I have been doing more research in an effort to understand this more. I have also been in the kitchen trying all kinds of new recipes to keep us satisfied. Right now we are really sticking with the program. The goal is to fix the health issues and then use the plan to maintain but begin to enjoy some of our favorite bad foods on weekends and such.

So, I do still plan to have my "Saturday Night Suppers" but for those interested I will also be posting my most successful low carb dishes as well. Tonight we had a recipe that I adapted from a Cooking Light recipe. I call it Spaghetti Squash Casserole. The ricotta on top of the tomato sauce reminds me of an appetizer we have sometimes which is simply a spicy tomato sauce poured over a log of goat cheese and baked until hot and bubbly. This is served as a spread with freshly sliced baquettes. Of course here we have served it over the squash and we get to eat gobs of it as dinner. I am telling you what - this food is not so bad! Everyone I have served this to has enjoyed it. This time when I made it the squash was pretty large - mine was 3.75 lbs. I would probably recommend 2 - 2.5 pounds.


Spaghetti Squash Casserole

One 2 - 2.5 lb spaghetti squash
2 cloves garlic, sliced
1/4 cup diced yellow onion
Two 14 oz cans tomato sauce
One 14 oz can diced tomatoes
1/4 cup dry white wine
1/2 tsp oregano
1/2 tsp thyme
1 tbs fresh basil
8 oz bulk sausage (I used Jimmy Dean Original)
1 15 oz container ricotta cheese
1/2 cup grated Parmesan cheese
dash more oregano
dash more thyme
fresh ground pepper
Parmesan cheese to sprinkling on top of casserole


1. Cook the squash - pierce it all over with a knife and microwave on high for about 8 minutes. Let stand until cool. (even though I pierced mine it still kind of exploded, photo above!) When cool, cut the squash in half and scoop out the seeds. Shred the squash into spaghetti like strands and put in a buttered casserole dish.


2. While the squash cooks prepare the sauce. Saute the garlic and onion in some olive oil until transparent, about 3-4 minutes. Add the tomatoes, wine, 1/2 tsp oregano, 1/2 tsp thyme, the basil and fresh ground pepper. Let simmer until somewhat thickened, about 1/2 an hour.

3. Brown and crumble the sausage.

4. Preheat oven to 375. Mix together the ricotta cheese the the 1/2 cup of Parmesan cheese. Add a dash of oregano and thyme and fresh ground pepper. Evenly distribute the sausage over the squash. Top the sausage layer with all of the tomato sauce. Top the tomato sauce with the ricotta mixture. I found the easiest way to do this is to take about a quarter cup at a time and flatten it in my hands and the turn out over the casserole. I was able to evenly cover the casserole with the mixture. Sprinkle the top with more Parmesan cheese. Bake about 30 minutes until bubbly. I run it under the broiler for the last 2 minutes or so. Let stand 10 minutes before digging in.


Sunday, August 15, 2010

New Kitchen Mascot

P1020674

Tomorrow is the first day of school. This is great for a bunch of reasons. One is, I was so excited to get this site up and running and had all these visions of what I was going to make and share and then... along came summer. The kids are off from school and entertaining them along with vacations and things got me side tracked. The other thing going on is that everyone else was really busy too! So now, everyone is back and staying put for a while and I will be able to have fun and entertain and cook again and watch my guests enjoy themselves.

Summer was great though. We went to Maine and I ate a year's supply of lobster and clams in about 10 days and relished every bite! We did other things besides eating - like visiting several wineries, our favorite being the Cellardoor Winery and Vineyards. We also took a boat ride out to Monhegan Island and hiked over to the cliffs where we had lunch overlooking spectacular views.

I took my daughters to Cincinnati, Ohio to visit their grandparents. My dad cooked all my favorites including beef tongue, veal sweetbreads, beef tripe and leg of lamb. Since I cannot get smoked beef tongue very easily here in Orlando my father always sends me home with one and my luggage always gets searched at check in. This time was no exception!

Anyway, while in Maine I got a new mascot for my kitchen. He is a real character. He needs a name so I am taking nominations. Check him out and send me your nomination for his name. Check back soon to find out what it is, and also to see new posts as I am planning on cooking up a storm!

Sunday, June 20, 2010

Duck Dinner


This past weekend I had my friends, April and Wes and their sons, over for another Saturday Night Supper. This menu was inspired by some foods we got to sample at the Taste of the Nation Event here in Orlando.

Everything turned out well but the hit of the evening was the cheese spread!

Menu - June 2010

Appetizers

Four Cheese Spread with Toasted Pecans and Craisins
Tomato Bruschetta

Dinner

Duck 2 Ways
Garlic Mashed Potatoes
Limas with Bacon

Dessert

Pumpkin Roll

Pumpkin Roll


My daughter has been asking me to make the pumpkin roll we enjoy during the holidays. Needless to say, you do not need to wait until Thanksgiving and Christmas to enjoy this treat so we made it for our most recent Saturday Night Supper. To lighten things up we did not use the cream cheese icing that is the norm for this dessert but instead filled it with a carton of light cool whip.


Pumpkin Roll

1/4 cup confectioners sugar
3/4 cup all-purpose flour
1/2 tsp baking powder
1/2 tsp baking soda
1/2 tsp cinnamon
1/2 tsp cloves
1 tsp lemon juice
1 tsp vanilla
1/4 tsp salt
3 large eggs
1 cup granulated sugar
2/3 cup pumpkin puree
1 cup chopped, toasted walnuts or pecans
1 8 oz container light cool whip

Preheat oven to 375 F. Grease a 15x10 inch jelly-roll pan very well and coat with flour. Beat eggs and sugar together until thick and lemon colored. Beat in pumpkin, lemon juice and vanilla. Stir in flour mixture. Spread into pan and sprinkle with nuts.

Bake for 13 - 15 minutes or until cake springs back when touched. While the cake is baking, coat a large cotton towel with the 1/4 cup of powdered sugar. When the cake is done loosen it all over with a spatula. Turn out onto the sugared towel. Immediately roll it up starting from a short side. Let it cool. Once cooled, unroll cake and spread with the cool whip. Wrap and refrigerate until serving.

Sift together flour, baking powder, baking soda, cinnamon, cloves and salt.

Duck, Two Ways


Okay, I have never cooked duck before. Whenever I wanted duck I would just ask my dad for it and he cooked it for me. Luckily for this dinner I was having my good friends over who would understand and do not mind being experimented on. Also, I make enough food on these evenings so that no matter what happens, no one will starve. Something is bound to turn out.

I did not really have time to shop around for duck. I only had my local grocery store and they only sell one kind of duck. Whole frozen duck. And you had to get the orange sauce pack to boot which really bugged me because you are paying by the pound and I did not want that orange sauce pack, but so be it. So now I had my duck. What to do with it? I knew I wanted to cook the breast part medium rare and I knew the rest had to be cooked longer, so I combined 2 recipes I found to make my meal.

We all loved the breast and I will seek out a place where I can just buy those, however, the port wine sauce turned out really good and you need the duck bones, gizzards and carcass to make the stock for that so I guess you still have to buy the whole duck too!

Duck, Two Ways

One 5 lb Duck
2 onions
1 carrot, peeled and cut into 1 inch sections
1 stalk celery, cut into 1 inch sections
1 tbls butter
5 cloves garlic, thinly sliced
1 cup ruby port
1 lb parsnips
1 1 inch piece fresh ginger
3 tbls lemon juice
1 tsp grated lemon rind
salt and pepper

Cut the duck into 2 breast and 2 thigh sections, removing the back bone. Remove the wings and bone the breast portions. Cut the wing tips off the wings. Put the wing tips, neck, gizzards, and breast bones into a pot. Add one onion, sliced, the carrot and the celery. Add 6 cups of water. Bring to a boil and simmer for an hour and a half. Strain. Set aside 1 1/2 cups of stock. Put remainder back into the pot.

Heat oven to 350. Chop the 2nd onion. Peel the parsnips and cut them into 2 inch by 1/4 inch sticks. Season the duck wings and leg/thigh sections with salt and pepper. Heat a large non stick pan with lid over medium high heat. Brown the duck on both sides. Remove the duck. Add the onion and parsnips and saute 5-6 minutes. Add the lemon juice, lemon rind and the 1 1/2 cups of stock. Place the duck thighs and wings over top of the parsnips. Cover the pot and bake for 1 hour. Set aside and let rest until serving time, up to 1/2 hour.

Melt the butter in a skillet and add the sliced garlic. Saute until the garlic starts to get lightly browned. Add the port and the remaining duck stock. Boil until reduced to 1 cup. Keep warm.

Season the duck breasts with salt and pepper. Heat a skillet over high heat. When hot add the breasts skin side down and cook for 6 minutes. Turn and cook an additional 6 minutes. Remove from heat and let rest for 6 minutes. Slice and serve with the port sauce.

Garlic Mashed Potatoes


Mashed potatoes are one of the all time best comfort foods. I have a friend who makes the absolute best mashed potatoes and I beg her to make them for me whenever I can. I do not even try to compete with her creamy, traditional version. Here I use the thin skinned yukon gold so I can mash with the skin on and I have seasoned them with garlic. These potatoes held on the to the port wine sauce that I made for this menu to go with the duck. The sauce turned out fabulous.


Garlic Mashed Potatoes
2 lbs Yukon Gold potatoes
5 cloves of garlic, peeled
3/4 cup milk
3 tbls buttery spread
Salt and pepper to taste

Put the whole potatoes and the garlic in a pot and cover with water. Bring to a boil and boil until the potatoes are tender, 25 minutes or so. Drain the potatoes and the garlic and put in a large bowl. Do not peel the potatoes. Heat the milk to a simmer. Add the milk to the potatoes and mash. Add the buttery spread and continue to mash. Season to taste with salt and pepper.

Lima Beans with Bacon


I try to serve a vegetarian meal or two a week, but I still like my meat. If ever I were to become a vegetarian the one thing I would truly miss is bacon. In my mind there is just nothing better in the meat world than crisp, yummy bacon. We do not eat it often, but we do enjoy it when we do. Here I have paired it with lima beans. Everyone at the table agreed that while limas would never become their favorite vegetable, if they had to eat them, bacon was a good bribe!

I thought they went really well with the duck.


Lima Beans with Bacon

3 slices of bacon
1 15 ounce can small green lima beans, undrained
salt and pepper to taste

Cut the bacon into 1 inch pieces. Saute until crisp. Do not drain. Add the lima beans. Bring to a boils and cook until most of the liquid cooks off but they are still moist. Taste and season with salt and pepper.

Cheese Spread


My friend April invited me to be her guest at the Orlando Taste of the Nation Event. We sampled this wonderful cheese spread there. This is my attempt to recreate it. I think it was the hit of my Saturday Night Supper.


Four Cheese Spread with Toasted Pecans and Craisins

4 ounces Brie cheese
4 ounces mild small holed Swiss cheese (such as Lorraine)
1 1/2 ounces Blue cheese
1/3 Cup grated Parmesan cheese
1/2 cup toasted pecans, chopped
1/2 cup dried cranberries
Honey to taste

Crackers for serving, I used a flat bread cracker

Remove the rind from the Brie. I use a carrot peeler for this. Combine the cheese in a food processor and process until well blended, scraping down the bowl a couple of times. Put the cheese mixture in a serving dish. Sprinkle with the pecans and cranberries. Drizzle lightly with the honey. Serve with crackers.

This is best served at room temperature.

Bruschetta


I love basil. I have an herb garden that is mostly about growing it and I use it in anything and everything all summer. Recently, I made some delicious pesto and some homemade basil pasta. I used my Atlas pasta machine to roll it out. In fact, I think I will dedicate a Saturday Night Supper just to basil in the very near future. This past weekend I used it in my fresh bruschetta topping. It is so simple and so delicious. The key to the best bruschetta is you must use really good bread and really good tomatoes. If you have that, the rest just happens.

Our grocery store here, Publix, sells this mountain white bread that is just so good and that is what I used. The loaf is a big round loaf so the slices are quite large. I used about 4-5 slices which I cut into 8 squares each to make bite size toasts to go with the topping.


Bruschetta

Enough slices of bread to make 25-30 bite size toasts
1/4 + 2 tbls olive oil
2 large cloves garlic
2-3 tomatoes (about 2 cups diced)
2 tbls chopped red onion
3 tbls fresh basil sliced into think ribbons
salt and fresh pepper to taste

Heat the oven to 350. Crush one clove garlic into 1/4 cup of olive oil. Brush the garlic oil on one side of the bread slices. Bake the bread on a cookie sheet, checking every 5 minutes until lightly browned.

Dice the tomatoes and mix with the remaining 2 tbls olive oil, the remaining garlic, and the onion and basil. Season with salt and pepper. Serve with the toasts.


Monday, May 17, 2010

My Second Official Saturday Night Supper!


I am so excited. I hosted my second official Saturday Night Supper. We had our friends Kim and Eric and their kids, Sonja and Jake over. We had a fantastic dinner with an Asian theme. We started out with endamame and Vietnamese spring rolls with nuoc cham dipping sauce. The endamame was easy. I got frozen endamame in the shell, heated them in the microwave, sprinkled them with kosher salt and set them out for everyone to munch on. Even the kids loved them. The spring rolls were awesome and garnered a lot of ooohhhs and aaaahhhs. It is one of the few deep fried foods I will make at home. My husband does the frying outside on the back porch. I do not like the smell that lingers in the house after deep frying so we set up the electric wok on the back porch and fry there. My husband does not do much cooking but he is the expert on frying up the spring rolls.

For dinner we had chicken wings with oyster sauce, beef with broccoli in oyster sauce, fried rice and steamed jasmine rice. As many of you know I am rather frugal so I have to tell you what I did. I use diced ham in the fried rice. Well ham, whether you buy a ham steak in the meat department or a fat slice in the deli, is at least $2.99 a lb. The grocery store had hams on sale for .99 lb., butt or shank half. So, I bought a 10 pound ham and cooked it last night. I served it for dinner last night, got the diced ham I needed for the fried rice, I have a nice ham bone in the freezer plus four 1 lb packs of leftover ham! I am going to also share with you how I cooked the ham because it really produces the most moist, wonderful ham and some fantastic broth as well that is going to make a wonderful soup this week. Look for the ham recipe in a separate post.

While I do love my sweets I put so much effort into the starters and dinner part of my meal that the dessert is often an afterthought. I have been known to pour some coffee and throw a box of Godiva Chocolates on the table and be done with it. So when Kim asked if she could bring something I said dessert please. She brought a wonderful cake that I know I have seen the recipe for but have never tried, a poke cake. It was really good. It was very light and refreshing. The perfect end to our meal. We were all so into eating eat it we forgot to take pictures. Luckily there was a little leftover so we got a shot of it at the last minute to post here. As you will see, we did a number on that cake. It was delicious. Thank you Kim!

Beef with Broccoli in Oyster Sauce


The marinade for this recipe makes even the toughest cut of beef tender!

Main Ingredients:

1 lb lean beef, thinly sliced into bite size pieces for stir fry
3-4 thin slices ginger
12 oz broccoli florets or do as I did and use a 12 oz package of prepared stir fry veggies from the produce department (not frozen!)


Marinade:

1/2 tsp baking soda
1 tlbs dry sherry
2 tbls water
3/4 tsp baking powder
1 tbls soy sauce
1 1/2 tbls cornstarch


Sauce:

1 tbls dry sherry
2 tbls oyster sauce
1/2 tlbs soy sauce
1 tsp sugar
1/4 cup water

Chopped scallions for garnish.

Mix together the ingredients for the marinade. Add the beef and let stand for 1 hour. Heat a large non-stick skillet over medium high heat. Mix together the sauce ingredients. Add the meat and ginger to the skillet. Stir fry until the meat is partially cooked. Add the vegetables and continue cooking until the meat is cooked through. Add the sauce and cook until the vegetables are tender. Remove from heat, garnish with the scallions and serve.

Chicken Wings with Oyster Sauce


This is just delicious. It is a two napkin meal as it is quite messy but worth it! Start this early in the day as the wings need to marinate in the soy sauce. I often freeze the wings in 2 lb packs with the soy sauce so they marinate as they thaw and are ready to go when I am.


2 lbs chicken wings
2 tbls soy sauce
1 1/2 cups water
2 tbls oyster sauce
1 tsp sugar
1/2 tsp pepper
5-6 thin slices ginger
2-3 cloves garlic, crushed
2 scallion, diced
1/1/2 tbls cornstarch mixed with 1/4 cup water

Toss the chicken wings in the soy sauce and let marinate in the refrigerator all day. Mix together the water, oyster sauce, sugar and pepper. When ready to cook heat a large non stick skillet over high heat. Add the wings, ginger and garlic. Cook the wings until browned on all sides, about 10 minutes. Add the oyster sauce mixture and bring to a boil. Cover and cook until the wings are tender, about 25 minutes. Remove the cover. The sauce in the skillet should be reduced by 1/2. Add the scallions and cook for a minute or two and then thicken with the cornstarch solution.


Serve and enjoy!

Fried Rice


I have experimented with many fried rice recipes and have come up with a version that I think is the best. Everyone who tries it loves it and my daughters tell me it is the best fried rice they have ever had! Start this early in the day. The rice needs to be cooked and chilled before using.


Fried Rice

1 1/2 cups jasmine rice
2 1/4 cups water, divided
1/8 cup plus 1 tbls soy sauce, divided
1 cup diced ham
1 cup diced onion
1 cup diced carrot
1 cup diced celery
2-3 cloves garlic, crushed
1 cup finely shredded cabbage
2 scallions, chopped
1 tbls oyster sauce
2 eggs, lightly beaten
Salt and pepper, to taste

Place the rice in a pan with 2 cups of water and 1/8 cup soy sauce. Bring to a boil then cover and simmer for 15 minutes. After 15 minutes remove the rice from the heat and set aside covered for 15 minutes. Fluff the rice and chill until ready to make the fried rice.

In a large non stick skillet saute the ham, onions, carrot, celery and garlic over medium high heat until the onions are translucent. Add the rice and continue cooking until the rice is heated through and starting to brown a little. Add the cabbage and the scallions and cook another 2-3 minutes. Mix together the remaining 1/4 cup water, the remaining soy sauce and the oyster sauce and mix into the rice. Cook and stir until well mixed in. Make a well in the center of the rice. Pour the egg in and scramble it. When just cooked incorporate it into the rice. Season with salt and pepper.

Serve and enjoy.


Vietnamese Spring Rolls


These are a very popular treat. I make the filling early in the day and refrigerate it. I fill the wrappers right before cooking but this goes very quickly once the filling is prepped.


Spring Rolls

1.3 oz skein bean thread vermicelli
1/3 cup dried black fungus or tree ear fungus
1/2 lb peeled carrots
1 cup finely shredded green cabbage
2-3 cloves of garlic, crushed
1 medium white or yellow onion, quartered
3 scallions
1 lb lean pork, cubed
2 tsp sugar
1 tsp dry sherry
2 tsp soy sauce
1 tsp salt
1/2 tsp pepper


One 25 count package spring roll wrappers

1 egg, lightly beaten for sealing the spring rolls

Oil, for deep frying

Soak the noodles in warm water to cover for about 20 minutes. Soak the tree ear fungus in warm water to cover for about 20 minutes.

Using the fine shredding disk, shred the carrots in the food processor. Set aside 2 tbls of the shreds for the dipping sauce. Put the rest in a large bowl. Add the cabbage and the garlic. Chop the onion and the scallions in the food processor and add them to the carrots. Pulse the pork in the food processor 5-6 times until minced and add it to the carrots. By now the noodles and the tree ear fungus should be softened. Drain them well and chop them in the food processor and add them to the pork and carrots. Add the seasonings and mix everything very well.

When I am ready to fill the rolls, I score my filling equally into 8 sections. Then I know to use each section to make 3 spring rolls. This helps me make sure the filling is divided equally between the 25 wrappers. Put a log of filling across the bottom of a wrapper at an angle to the square and start rolling. Then bring in the sides and brush across the top point with egg. Continue rolling the spring roll and seal.

Bring the oil to 350 F and fry the spring rolls, 5 at a time, turning 1-2 times until golden and cooked through - about 5 minutes.


Nuoc Cham Dipping Sauce

2 tbls finely shredded carrot
2 cloves garlic, crushed
1/4 tsp crushed red chili pepper
1/2 cup rice vinegar
1/3 cup sugar
1/3 cup fish sauce
1/3 cup water


Combine all ingredients. Stir to dissolve sugar. Refrigerate until ready to use.

The Best Ham


Here is how I cook ham. There is always the worry that it will dry out. With my method you will always be able to enjoy moist, delicious meat. I do not get the spiral sliced hams because they can be dry. It is just as easy to slice a large piece off the bone and then slice that chunk thinly for serving. Also, if you wish to use larger chunks from the leftovers you will have them as opposed to an already fully sliced ham.

1/2 a smoked ham, shank or butt half though I like the shank. (I had to get the butt half this last time because they were out of the shank).

1/3 cup mustard
1/3 cup honey

Put a rack in the bottom of a large pot with a cover. Fill with water up to the rack. Place the ham on the rack. Cover the pot and bring it to a boil on the stove top. Reduce heat to low and simmer the ham for one hour. The steam cooks the ham more quickly than it would cook in the oven but also keeps the ham very moist.


Preheat the oven to 400 F. Place them ham on a baking sheet and score the fat. Mix the honey and mustard together and brush the mixture over the ham. Place it in the oven for 20-25 minutes. It is now ready to slice and serve.

Do not throw away the steaming liquid. Plus, all that lovely fat that nobody will eat that surrounds the ham is full of smokey flavor. As you remove the fat from the meat toss it into the cooking liquid. Add water to cover and simmer for about an hour. Strain the liquid and now throw away the fat. Chill the liquid. Spoon off the solidified layer of fat and you will have a lovely, smokey broth for some soup later in the week. Save the ham bone to make another pot of soup at a later date. This ham will make so many wonderful meals!

By the way, that solid pork fat you spoon off is wonderful stuff for pan frying and sauteing.

Sunday, May 16, 2010

Kim's Poke Cake


This was moist and light tasting. I will definitely be making it myself.


1 white cake mix
1 box of strawberry jello
one 8 oz carton cool whip


Prepare cake according to package and bake in a 13 X 9 inch pan. Prepare jello according to package. When the cake is done use a straw to poke holes all over the cake. Pour the jello over top of the cake. Chill thoroughly. Spread top with cool whip and keep chilled until ready to serve.

Monday, May 10, 2010

Mother's Day Weekend

I did not do any cooking this past weekend. It was Mother's Day and we stayed at a beautiful hotel near Disney for the weekend. We ate at some wonderful restaurants featuring different ethnic cuisines. It all really started on Friday, April 30, with my birthday dinner at a Korean restaurant. My family enjoyed cooking on on the griddle set in the middle of the table. My favorite part was the dozen or so little pickles and kimchis that are served with the meal. The food is so healthy too. The meat is grilled and then wrapped in lettuce leaves along with some of the pickles for garnish. Very delicious!

On Saturday, May 8, my choice for lunch was a Chinese dim sum restaurant. If you have never had dim sum you really should try it. These are little plates of both savory and sweet dishes. You can try so many different things because it is not one big helping of something. The more people you have in your party the more little dishes you can get to try and share. Our family of four had 8 little dishes. My personal favorites include the sticky rice wrapped in lotus leaf and the turnip cake which is made with daikon radish, not turnips as the name would suggest. I also love the squid in curry sauce and would have drank the sauce left in the dish if the waitress had not so promptly removed it from the table once the squid was gone! Adventurous types can choose duck feet and beef tendons among other things!

On Saturday night we ventured out to an Ethiopian restaurant for dinner. The fun part about this dinner is that you eat with your hands. The food is served on a big pancake called injera. Additional pancakes are provided on the side. You tear off pieces of the pancake and use them to pick up your food and eat it. We must have looked like we knew what we were doing because the servers never asked if we had eaten at an Ethiopian restaurant before. They just put the food on the table with the basket of extra pancakes and said enjoy. It was my husband's first time and he said it was a good thing I knew what to do because he would have been asking where the forks, knives and plates were! The food was delicious. It included two highly seasoned meat dishes, collard greens, fresh green salad and a lentil dish. This was all arranged on one large pancake. The juices from the different dishes soaked into the pancake. It was served with a glass of Ethiopian honey wine. The wine was sweet but refreshing.

In between our dim sum lunch and Ethiopian dinner we stopped by Epcot to see Davey Jones play. He puts on a fun show. Even our 8 year old daughters enjoyed it, sort of. We had played the music for them ahead of time. Knowing the words makes a huge difference in their appreciation of the entertainment.

We decided to go for Latin American cuisine on Sunday for brunch. We had a beef empanada and a plate of chorizo sausage. The dinners, one chicken and one steak, were well seasoned and served with rice and beans and plantain or yucca fries. Although it was early in the day it was Mother's Day and therefore called for a glass of the sangria. Everything was wonderful.

By now I was craving some sugar and chocolate so we headed over to my favorite grocery store, Whole Foods Market. We went to the pastry case and picked put a chocolate cup filled with espresso mousse and another filled with chocolate mousse. We sat in the dining area and enjoyed our sugar fix.

After this we went back to Epcot for the rest of the day. We did a few new things and some of our standard favorites then ended the trip with a second dose of Davey Jones. We were finally getting our appetites back after having eaten so well earlier so we stopped and got a couple of orders of sushi at the Japanese Pavilion.

I am now motivated to hit the kitchen to try to create some new and wonderful flavors to serve to family and friends.

I love to eat, don't you?!

Sunday, May 2, 2010

Red Thai Seafood Curry


I love Thai food. The flavors are so fresh and delicious. Last night I made a red Thai seafood curry. Sometimes I make the curry paste from scratch however things got busy yesterday and so I did not get started on dinner until late. I compromised and used a commercial red curry paste. I used Mae Ploy brand which is a good one if you are not inclined to make it yourself. The other issue I face is that my daughters are 8 and have sensitive taste buds. When I make the curry paste myself it is quite fiery. The Mae Ploy is somewhat milder in flavor and will suit the young taste buds better. I love my food very hot and spicy. To accommodate this I dry habernero peppers in the oven. Once they are completely dry I run them through the food processor until they are powder. I keep a vial of this powder in my purse for eating out and in my kitchen to spice up my food. I have several spice loving friends and keep them supplied as well!

I also made a fresh summer roll to go along with this theme. I made a Thai beef salad and stuffed it into a rice paper wrapper. My daughters just loved this. It turned out very well. The great thing is, this dish is so healthy, no fat.

I used zucchini, carrot, baby corn and bell pepper in my curry but any vegetables that appeal to you will work. For the seafood I used shrimp, squid, scallops and tilapia.

Red Thai Seafood Curry

2 tbls red curry paste
1 15 oz can coconut milk
1 large zucchini diced
1 large carrot, peeled and diced
1 15 oz baby corn cut in half
1 small to medium bell pepper cut into strips
2 lbs assorted seafood - shrimp, squid, scallops, white fish
2 tsp fresh slivered kafir lime leaf or 1 tsp grated lime peel
2 tsp thai or italian basil, slivered
2 tbls fish sauce
2 tsp brown sugar
juice from 1 lime

fresh steamed jasmine rice for serving

Heat a large skillet over medium high heat. Add the curry paste and 2-3 tbls of coconut milk. Simmer 3-4 minutes until fragrant. Add the lime leaf or peel. Add the vegetables and 1/2 remaining coconut milk and cook 3-4 minutes until just starting to get tender. Add the seafood and the remaining coconut milk and cook until the seafood is just done - about 2-3 minutes. Add the fish sauce, brown sugar, basil and lime juice. Taste and adjust seasonings accordingly. Serve over rice.


Wednesday, April 28, 2010

Coming up soon....

Be on the lookout for my next Saturday Night Supper Menu coming up following this weekend. My birthday is next week so I plan to cook up something special for myself! While my family has become more adventurous in the eating department (not always by choice) many of my favorites are not what they would choose. While I respect that most of the time, and I will certainly come up with a diverse enough menu that there will be something for everyone, it will mostly be composed of things I love. So do come back and see what is on the menu for Saturday Night.

Monday, April 26, 2010

Dinosaur Cake


The cake roll recipe here is from Weight Watchers Magazine with some minor changes. In the recipe they do call for greasing the jelly roll pan, lining the greased pan with parchment and greasing and flouring the parchment. Thus far I have gotten away with greasing and flouring my jelly roll pan VERY well and skipping the parchment part. I do thoroughly loosen the cake all around with a thin spatula before inverting.

3 tbls confectioners sugar
3/4 cup all purpose flour
1/3 3 cup unsweetened cocoa powder
1 oz milk chocolate, grated
1/2 tsp instant espresso powder
1/2 tsp baking powder
1/4 tsp baking soda
1/8 tsp salt
3 large eggs
3/4 cup granulated sugar
1 1/2 tsp vanilla
1/2 cup milk

Sift together the flour, cocoa,espresso powder, baking powder, baking soda and salt. Mix in grated chocolate.

In a separate bowl beat together the eggs, sugar and vanilla until thickened. Alternately add the flour and milk, ending with the flour mixture.

Pour batter in pan. Bake 8 to 10 minutes until cake is done and springs back in the center.

While the cake is baking sprinkle the 3 tbls of confectioners sugar over a large kitchen towel.

When the cake is done invert it onto the towel. While it is still warm roll the cake up along with the towel beginning with a short end. Allow the cake to cool while rolled up.

I would like to add at this point that from now on I am going to do the inverting part OUTSIDE. Not that the kitchen did not need dusting anyway BUT the inverting part does make a mess. It has happened time again because I make those yummy pumpkin rolls at Thanksgiving and Christmas. So I have now learned. Take the whole shebang outside.

For the Filling:

1 8 oz container light coolwhip, thawed
2 oz dark chocolate

Put the dark chocolate in a large microwave safe bowl and microwave for 45 seconds. Stir and then microwave for 15 second intervals until completely melted. Fold in coolwhip.

Unroll cooled cake. Spread with coolwhip filling and roll back up. Refrigerate until ready to serve.

At this point the serving options are up to you. We made leaf decorations by melting almond bark and tinting it green. We then painted it on real leaves and let it harden. We peeled off the real leaves and were left with the edible ones. We glued them and the dinosaurs on with canned frosting.

Sunday, April 25, 2010

Foccacia


I use my bread machine all the time but only for the dough cycle. It is just so convenient to just toss in the ingredients and let the machine do all the mixing and kneading. I do not like the shape of machine made dough so I take it out after the dough cycle then shape and bake conventionally. For this dinner I made a loaf of foccacia.

1/2 cup water
1 tbls olive oil
1 tsp sugar
1/2 tsp salt
2 tsp chopped dried rosemary
1 1/2 cups bread flour
1/2 cup wheat bran
1 1/2 tsp yeast
1 medium onion thinly sliced 1 plum tomato diced
salt and pepper to taste
2-3 tbls Parmesan cheese

Combine the water and the next 7 ingredients in the bread machine and let it run through the dough cycle. Meanwhile, saute the onion and tomato together until the onion is tender. Season with salt and pepper. Let cool completely.

When the dough is done, spread it out to 1/4 inch disk on a piece of cornmeal sprinkled parchment paper set on a plate. Spread the onion mixture over the dough. Sprinkle with the Parmesan cheese. Let rise in a moist warm place (I bring a mug of water to a boil in the microwave and then put the dough in there to rise) for 40- 45 minutes.

Place a cookie sheet in the oven and heat the oven to 375. Transfer the dough, parchment paper and all, to the baking sheet. Bake for 25-30 minutes until done.

Black Beans and Rice


I love beans and rice. Sometimes I mix the rice and beans together and serve it that way but since we had a lot of kids I served the two separately so the kids could eat just rice if they chose.


8 oz black beans
2 medium yellow onions
1 jalapeno pepper, quartered and seeded
1 Bay leaf
1 tbls olive oil
1 medium green bell pepper, chopped
4 cloves garlic crushed
1/2 tsp sugar
Salt and freshly ground pepper to taste
2 tbls sherry vinegar or dry sherry (I prefer the sherry vinegar)
6 cups cooked white rice
Enhancements: Chopped red onion, finely chopped cilantro

Soak the black beans overnight in water to cover. Drain the beans and add fresh water to cover by 2 inches or so. Add one yellow onion cut in half and the quartered jalapeno and bay leaf. Cook for 1 1/2 - 2 hours until the beans are tender. Remove the onion and jalepeno from the pot.


Chop the remaining onion. Saute the chopped onion, bell pepper, garlic, and sugar in the olive oil until onion is tender and translucent. Add one cup of the cooked black beans and mash the beans. Add the mashed bean mixture to the bean pot. Season to taste with salt and pepper. Cook until the beans just show in the liquid in the pot. Add the vinegar or sherry, adjust the seasonings and serve over white rice. Serve with enhancements if desired.


Tomato Cucumber Salad with Dill and Feta


I just love this salad. It is so refreshing! When deciding whether to peel or not to peel the cucumbers, if I can get them unwaxed, I simply score them top to bottom with a fork all the way around and use them peel and all. If all I can get are waxed then the peel goes.


Fresh dill can be chopped and frozen. I buy a big bunch of it at the produce market. Whatever I am not currently using I chop up and put in a zip lock bag in the freezer. Whenever I need fresh dill it is right there. None of it goes to waste even when I cannot use the whole bunch right away. The same thing can be done with parsley so if you have a bunch you cannot use right away, chop it and freeze it. Use as you would fresh.

1 large tomato, diced
1 large cucumber, diced
1/4 cup crumbled feta
2 tbls toasted pinenuts
2 tbls chopped fresh dill
2 tbls chopped red onion
1 tbls extra virgin olive oil
1 tbls balsamic vinegar
1 tbls red wine vinegar
salt and freshly ground pepper to taste

Combine all ingredients in a large bowl. Refrigerate until ready to serve.


Greek-Style Spaghetti Squash Salad


I adapted this recipe from Cooking Light. Everyone enjoyed it. I cut the original recipe in half because I had a small squash. The original recipe also called for a can of chickpeas which I did not include since one of my guests is not fond of them. We all agreed that it was great without them. I also changed some of the other ratios to suit my taste. I will definately be making this a lot this summer.


1 1/2 tbls red wine vinegar
1 tsp extra virgin olive oil
1/2 tsp dried oregano
1/4 tsp salt
1/4 tsp black pepper
1 clove garlic, crushed
2 cups cooked spaghetti squash
1 cup diced tomato
1/2 cup diced cucumber
1/4 cup crumbled feta cheese
2 tbls diced green bell pepper
2 tbls diced red onion
2 tbls chopped, pitted kalamata olives


Combine first 6 ingredients and blend well.


Combine the remaining ingredients in a large bowl. Add the dressing and toss well. Cover and chill at least 2 hours.